
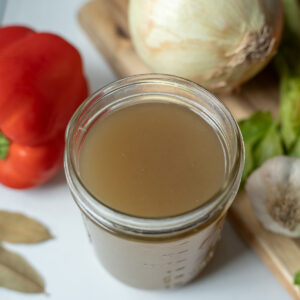
Making a big batch of homemade chicken broth is one of my favorite ways to stock my freezer. I can control the amount of sodium that goes into my food, and I end up with a rich, flavorful broth that makes soups, stews, rice, sauces, and so many other recipes taste so much better. It does take a few hours to make, but the flavor and convenience are well worth the effort.
Another good reason to make chicken broth, or at least the way I make it, is that buying whole chickens is almost always cheaper than buying boneless chicken. Whenever I find whole chickens on sale, I buy several and keep them in the freezer. Then, whenever I'm ready to make another batch of chicken broth, I simply thaw them and get cooking.
This also allows me to use every part of the chicken. The bones create a rich, flavorful broth, while the meat becomes the base for other meals like shredded chicken, arroz con pollo (Costa Rican-style chicken and rice), or chicken soup. Nothing goes to waste, and I end up with homemade broth plus several ready-to-use meals.
At the moment, I don't have any of those recipes available on the blog or YouTube channel. I do have my Chicken Stew recipe, which also uses homemade chicken broth. If you'd like to see recipes like shredded chicken, arroz con pollo, or chicken soup, let me know in the comments!
🎥Watch Video Here
Why I Make Chicken Broth in Bulk
Other than the reasons I mentioned above, why do I make such a big batch of chicken broth? Simply because, while the process is easy, it does take time. Instead of making a small batch every month, I make a double batch using 4 whole chickens, which lasts me for months.
In the video, you'll see me using 4 whole chickens. For the printable recipe below, I cut everything in half to make it more practical for everyday cooking. The process is exactly the same, just on a smaller scale.
If you're planning to can your chicken broth instead of freezing it, making a large batch makes even more sense. Since the process takes time from start to finish, it's more efficient to prepare, strain, and preserve a larger quantity all at once.
What You'll Need to Make a Big Batch of Chicken Broth
The ingredients below are the ones I used for this recipe, but whenever I'm making a big batch of chicken broth, I like to check my refrigerator first and see if I have vegetables that need to be used soon. This is a great way to reduce food waste while adding even more flavor to the broth.
You could also use vegetables like zucchini, cabbage, tomatoes, leeks, mushrooms, cauliflower, or even corn cobs.
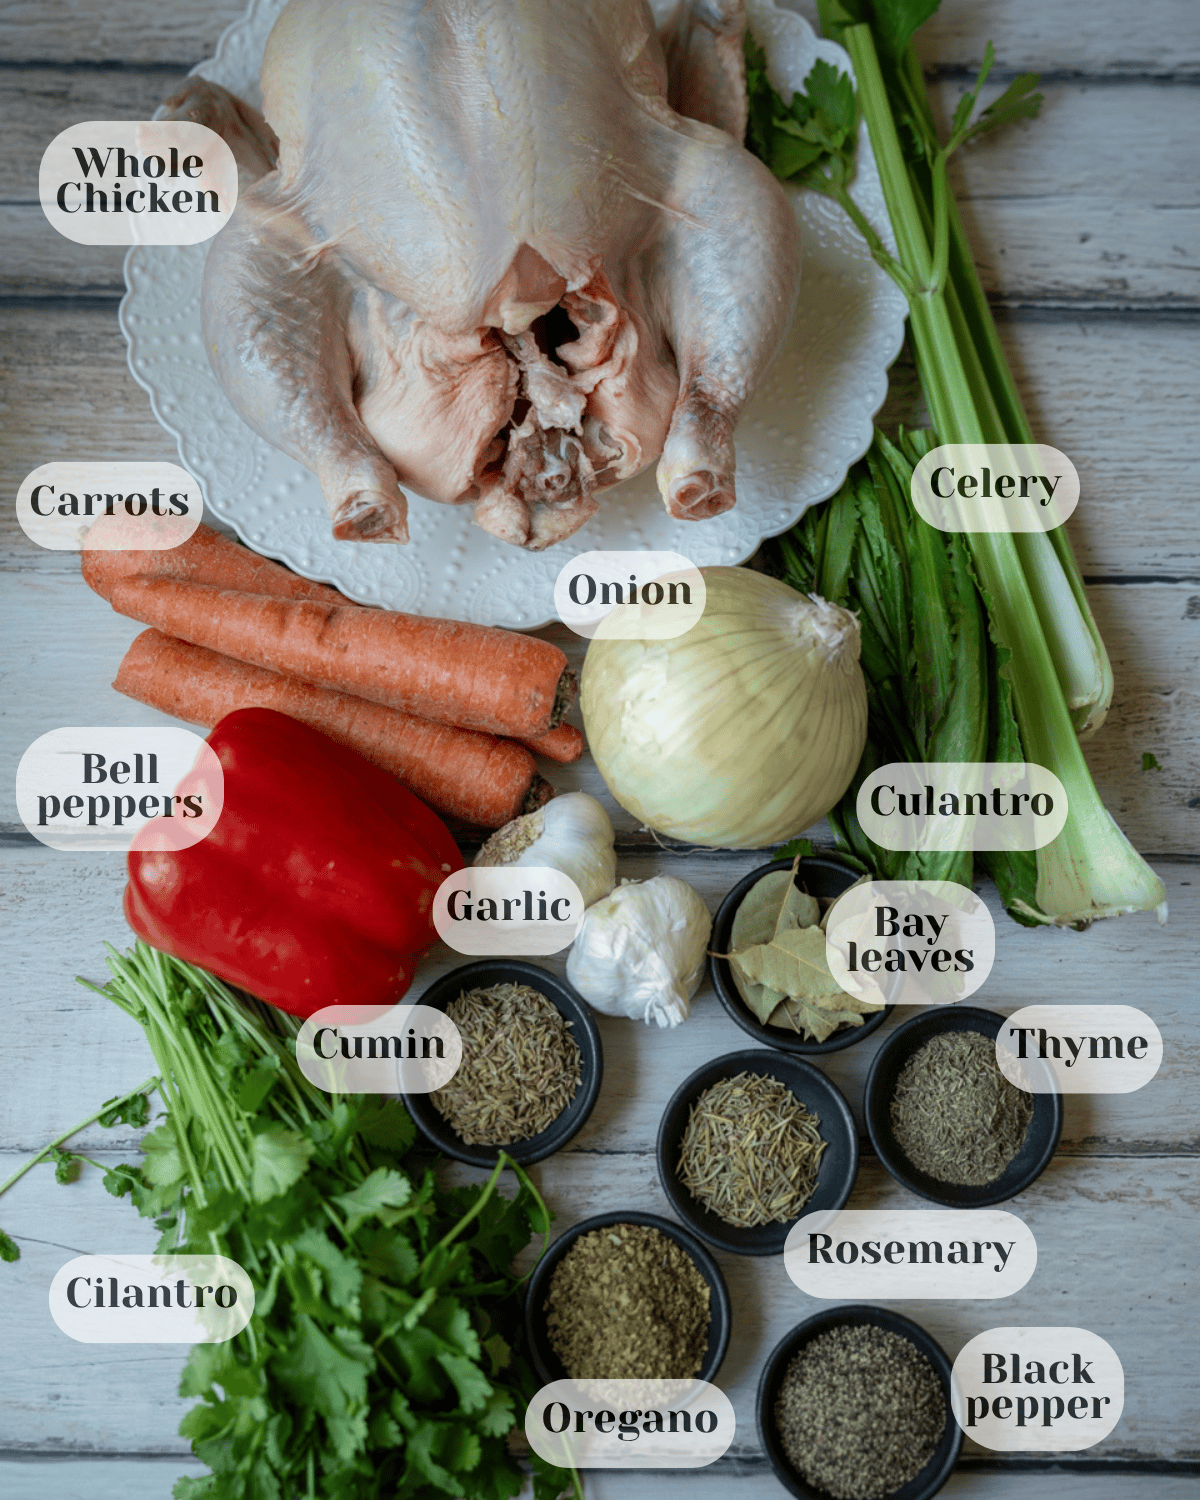
🐔 Whole Chickens
I like using whole chickens because they're usually much cheaper than buying boneless chicken. Plus, I get both the meat and the bones. If you have the carcasses from rotisserie chickens, don't throw them away! Freeze them in a bag, and once you have 4 to 6 carcasses, use them to make homemade chicken broth. Those bones still have plenty of flavor left in them.
💧 Water
Water is one of the most important ingredients in this recipe. The less water you use, the more concentrated and flavorful your chicken broth will be. The more water you add, the larger the yield, but the flavor will be milder. I also recommend keeping the broth at a gentle simmer instead of a rolling boil. Boiling causes more evaporation, which reduces the amount of broth you'll end up with.
🥕 Vegetables
For the vegetables, I'm using carrots, celery, onions, bell peppers, cilantro, culantro, and garlic. Together they create a rich, well-balanced broth with lots of flavor. Feel free to adjust the vegetables based on what you have on hand, but I recommend keeping the carrots, celery, and onions since they are the foundation of a good chicken broth.
🌿 Herbs & Seasonings
For the herbs and seasonings, I'm using oregano, black pepper, bay leaves, cumin seeds, thyme, basil, and rosemary. Feel free to adjust them to your taste or use whatever herbs you have available. One thing you'll notice is that I don't add any salt. Since I don't know what recipes I'll be using this broth for later, I prefer to leave it unsalted and season each dish individually. That way, I have complete control over the final flavor.
💡Tips for the Best Homemade Chicken Broth
- Keep the broth at a gentle simmer to extract plenty of flavor without causing excessive evaporation, since a rolling boil will reduce the amount of broth you end up with.
- I purposely don't add salt to my chicken broth because I don't know what recipe I'll be using it for later, which gives me complete control over the seasoning of each dish.
- During the first hour of cooking, skim off the foam and excess fat that rises to the surface, then check it again as the bones continue cooking since more fat may appear before straining the broth.
- After removing the larger pieces of chicken, go back and clean the bones once they've cooled, you'll be surprised how much meat is still attached, and it's perfect for soups, chicken salad, shredded chicken, or arroz con pollo.
- A regular strainer removes the vegetables and bones, while a second pass through cheesecloth removes the fine sediment, resulting in a much cleaner, clearer broth.
- Don't pour the chicken fat down the drain; let it cool, pour it into a disposable container or bag, and throw it in the trash to help prevent clogged drains.
- Making a big batch of chicken broth? Save yourself the headache of using a cheesecloth and use a fat separator instead. It's much faster and makes the whole process a lot easier.
How to Make Homemade Chicken Broth
The instructions below are for a batch made with 2 whole chickens. If you decide to double the recipe, the cooking times may need to be extended since a larger pot takes longer to come up to temperature and extract all the flavor from the chicken and bones.
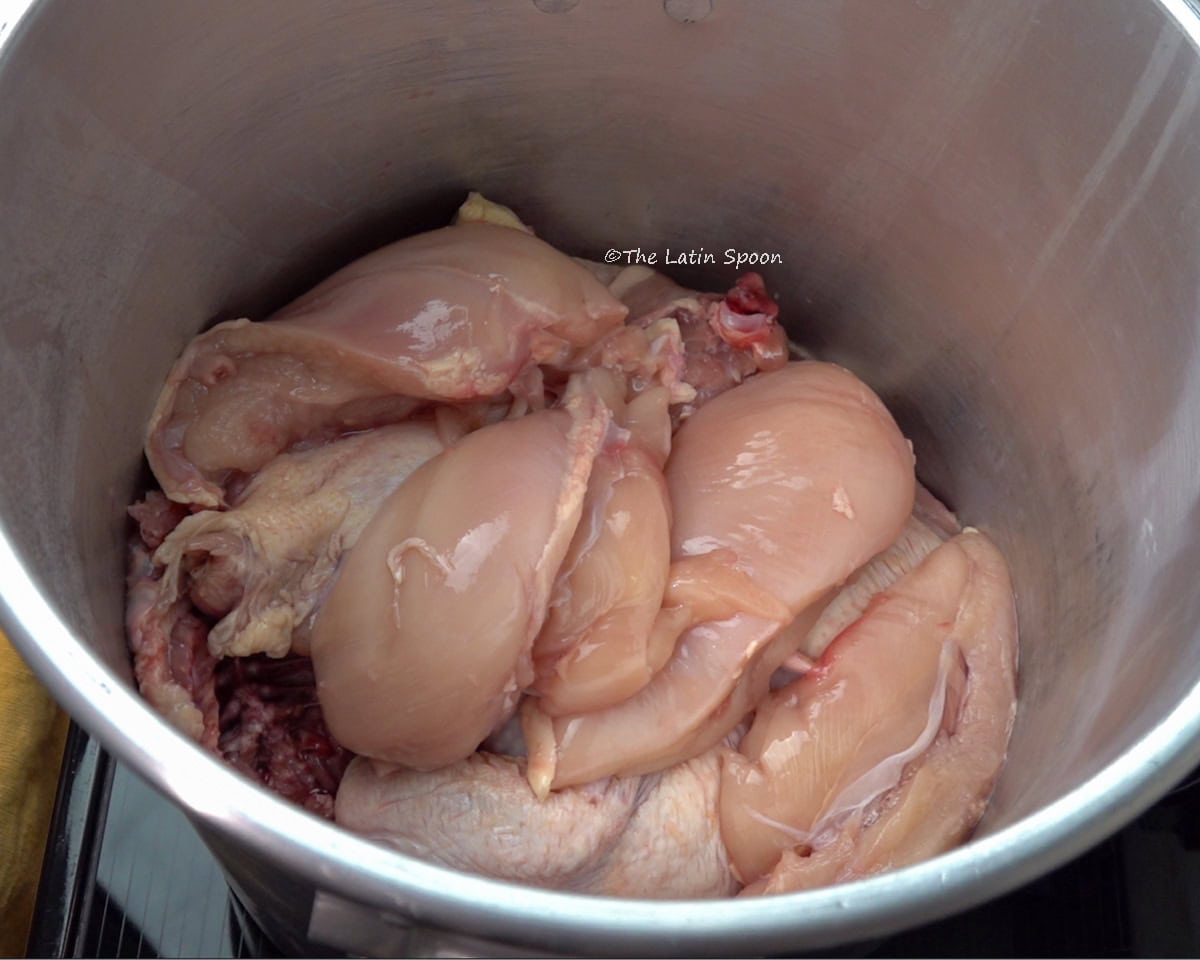
Step 1: Prepare the Chicken.
Debone the chickens and remove the skin if you prefer a leaner broth. I also like to trim off any excess fat and remove the tail before adding the chicken to the pot. Don't throw away the bones—they are one of the main ingredients that give homemade chicken broth its rich flavor.
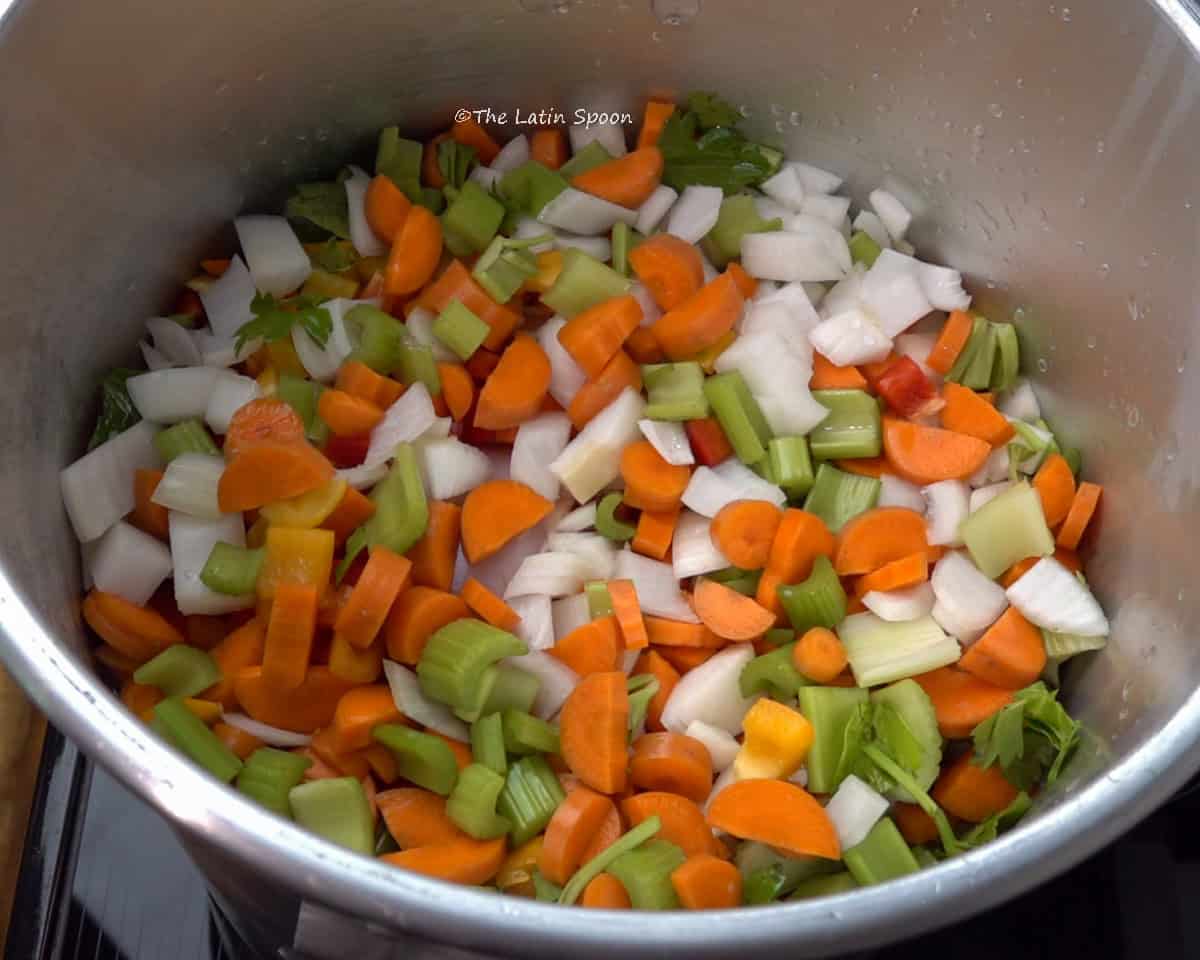
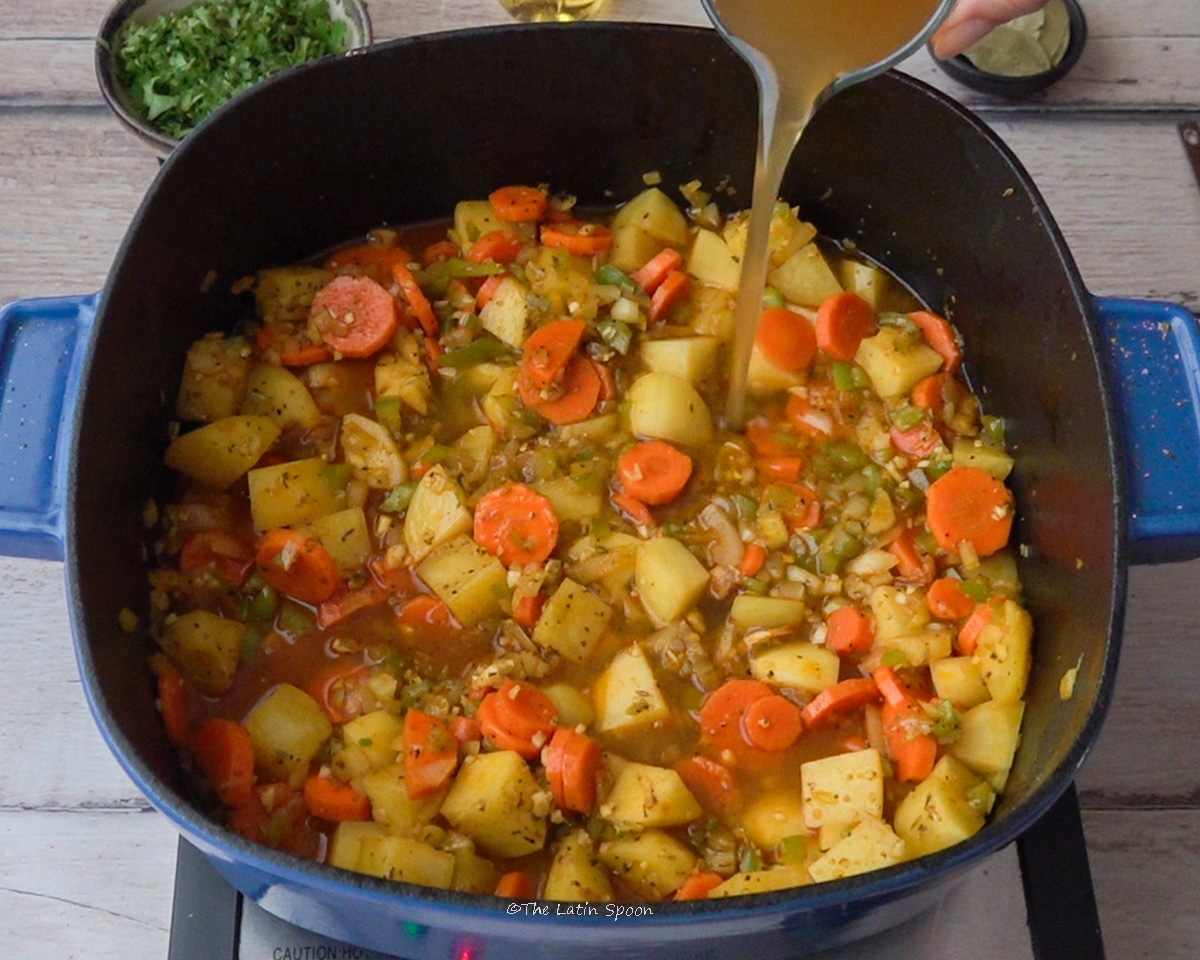
Step 2: Prepare the Vegetables.
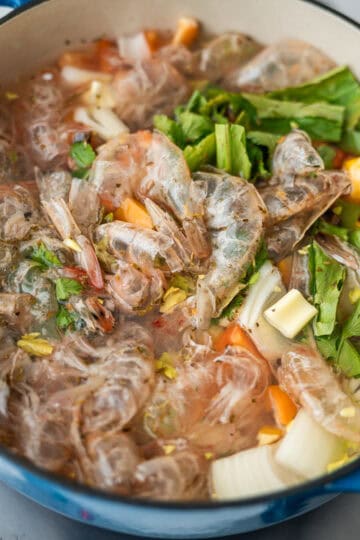
Wash and roughly chop the carrots, celery, onions, bell peppers, cilantro, culantro, and garlic. Since everything will be simmering for a long time, the size of the vegetables isn't important. They'll release their flavor into the broth and will be discarded at the end of the cooking process.
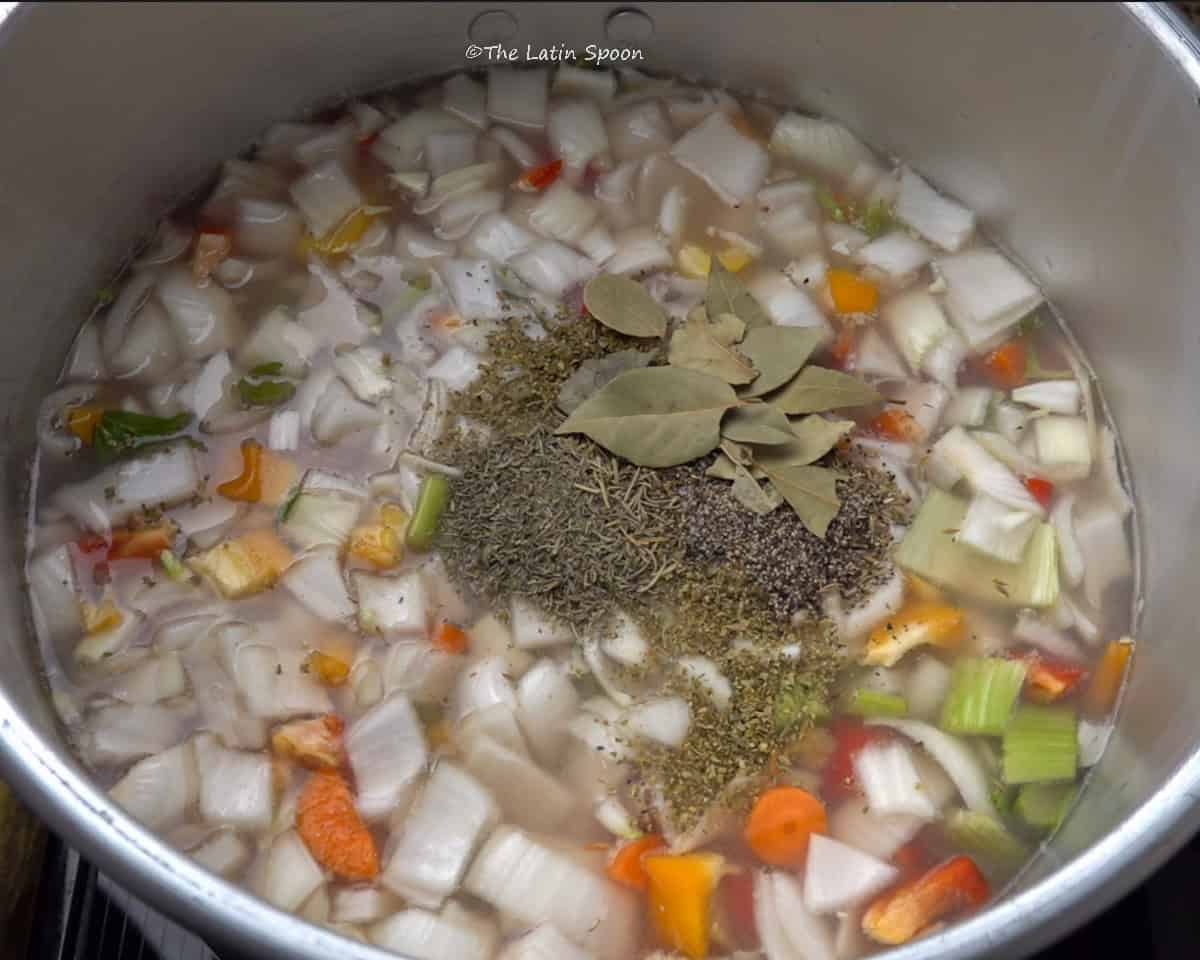
Step 3: Add the Water and Seasonings.
Use enough water to completely cover the chicken. Stir everything together and bring it to a gentle simmer. If you're making a large batch like I did, it may take about 30 minutes for the pot to come up to temperature. Avoid a rolling boil, as too much evaporation will reduce the amount of broth you end up with.
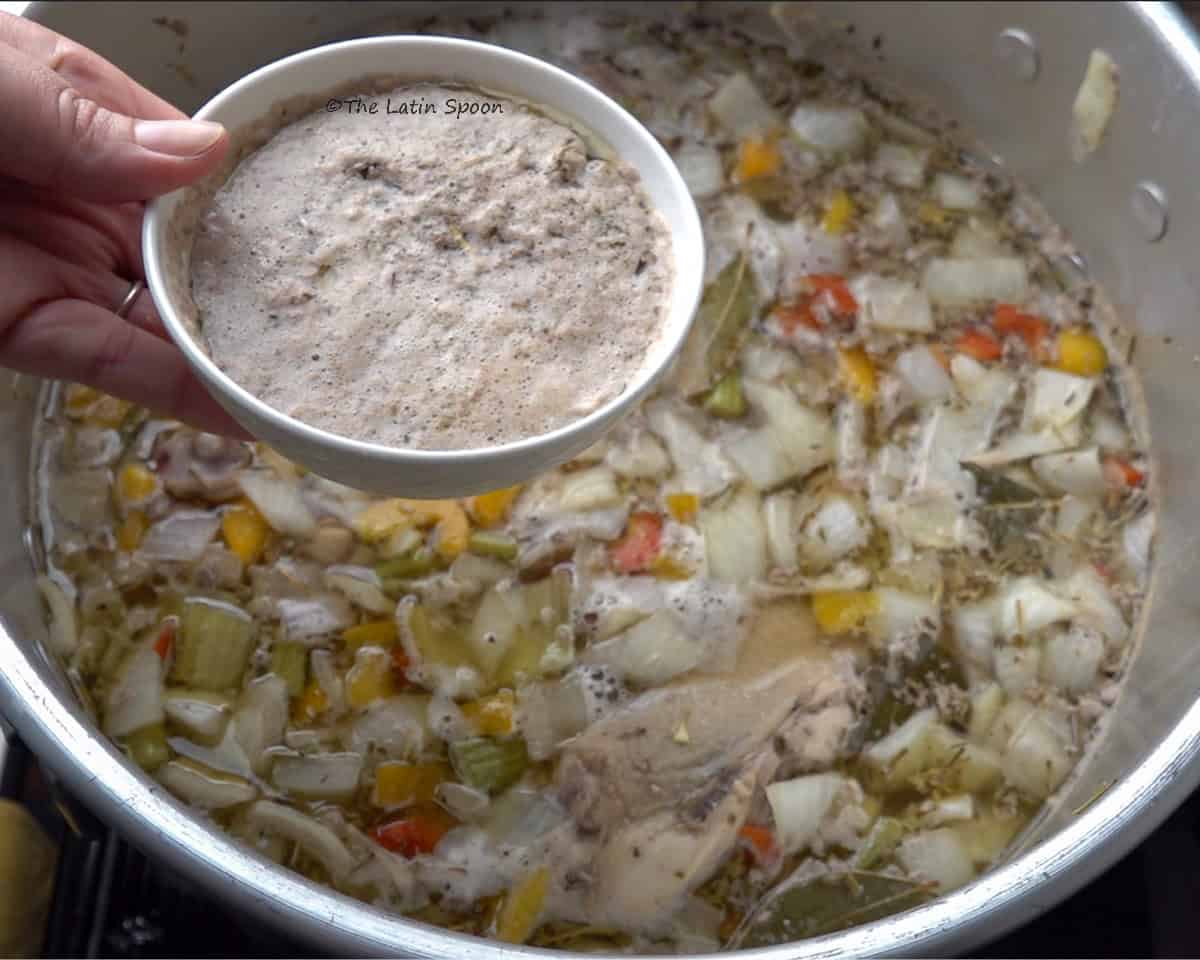
Step 4: Remove the Foam and Fat.
After about an hour of cooking, let the broth sit for a minute so the foam and fat can rise to the surface. Using a spoon, carefully skim off as much of the foam and excess fat as possible. This helps produce a cleaner, clearer broth with a better flavor. Continue simmering the broth gently after skimming.
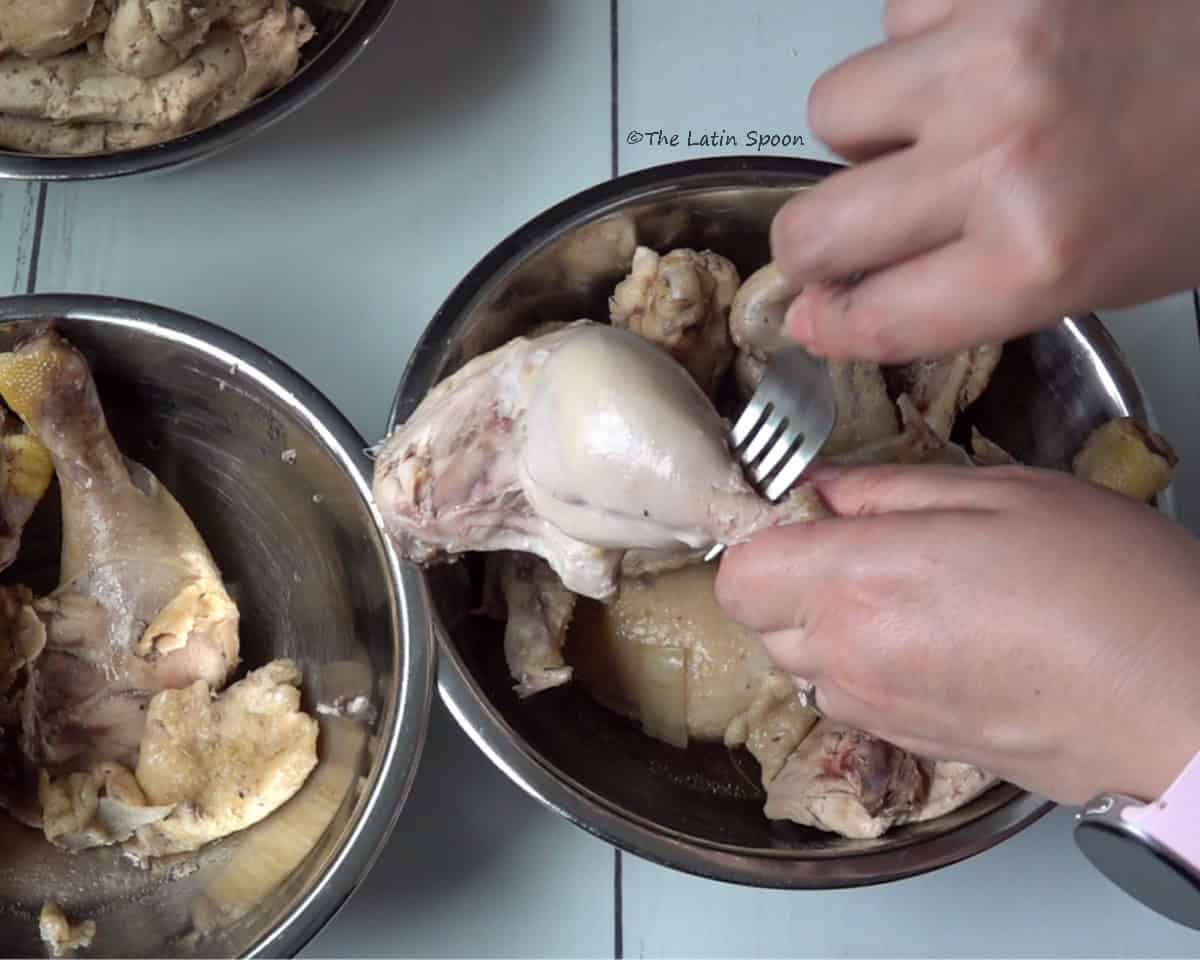
Step 5: Remove the Chicken and Separate the Meat.
After about 1 hour of cooking, remove the chicken from the broth and let it cool just enough to handle. Separate the meat from the bones using your hands, or use a fork if it's still too hot. Set the meat aside for other recipes.
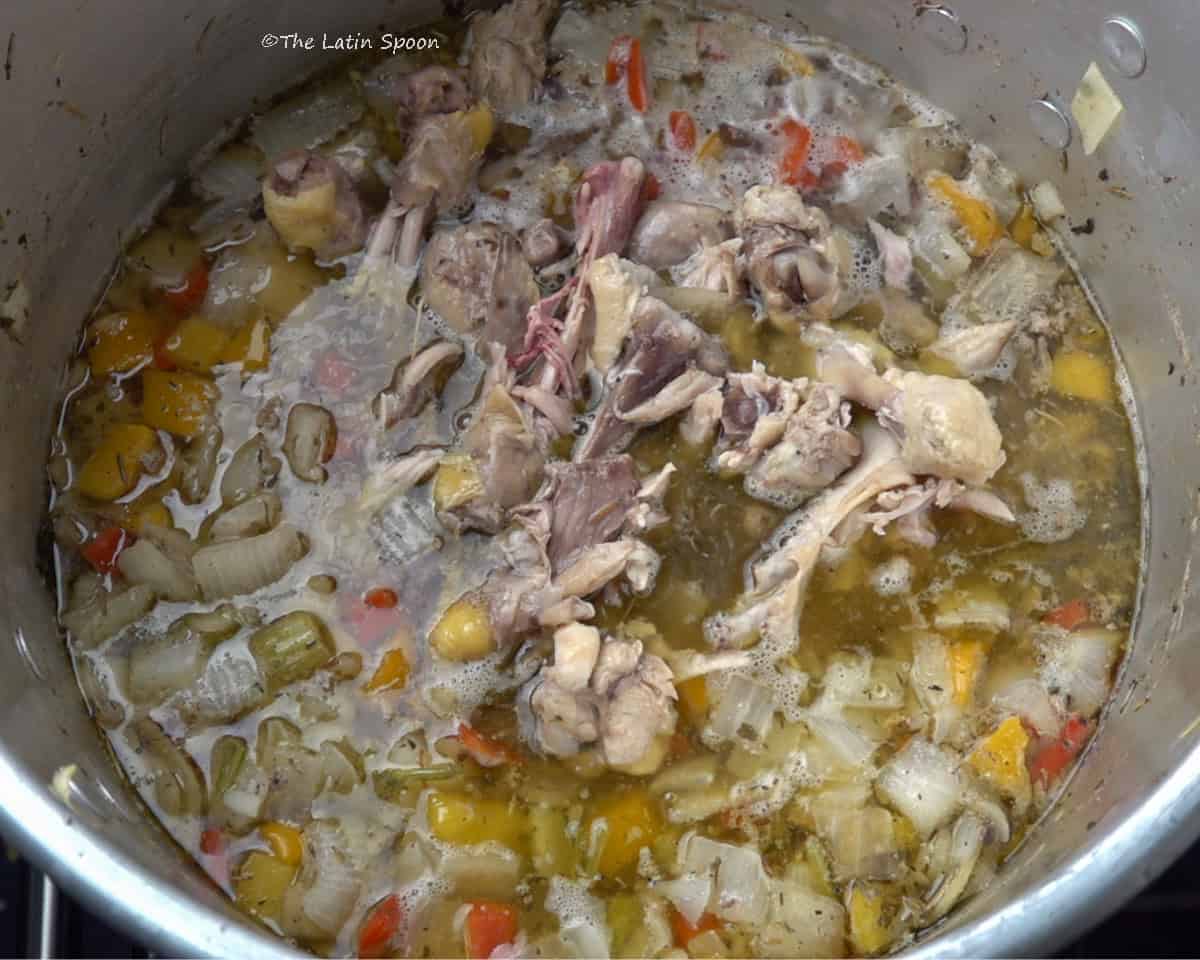
Step 6: Return the Bones to the Broth.
Once you've removed as much meat as possible, return the bones to the pot. Stir everything well and continue simmering for about another hour to extract as much flavor as possible from the bones. As the broth continues to cook, more fat may rise to the surface. Skim it off as needed to keep the broth clean and clear.
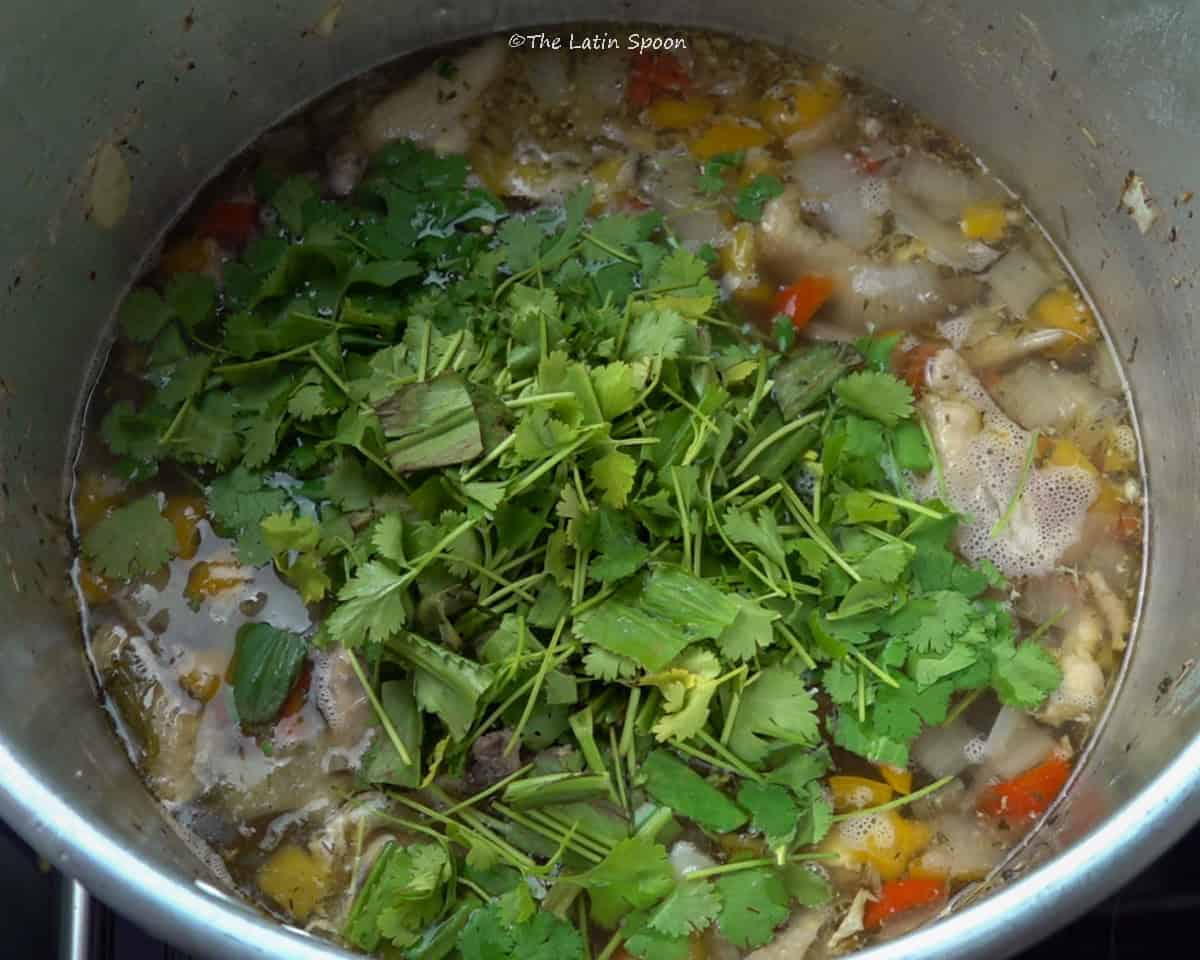
Step 7: Add the Fresh Herbs.
Now it's time to add the cilantro and culantro. If you notice that some of the dried herbs were removed while skimming the foam and fat, feel free to adjust the seasonings by adding a little more oregano, thyme, or any of the herbs you used earlier. Continue cooking over a gentle simmer.
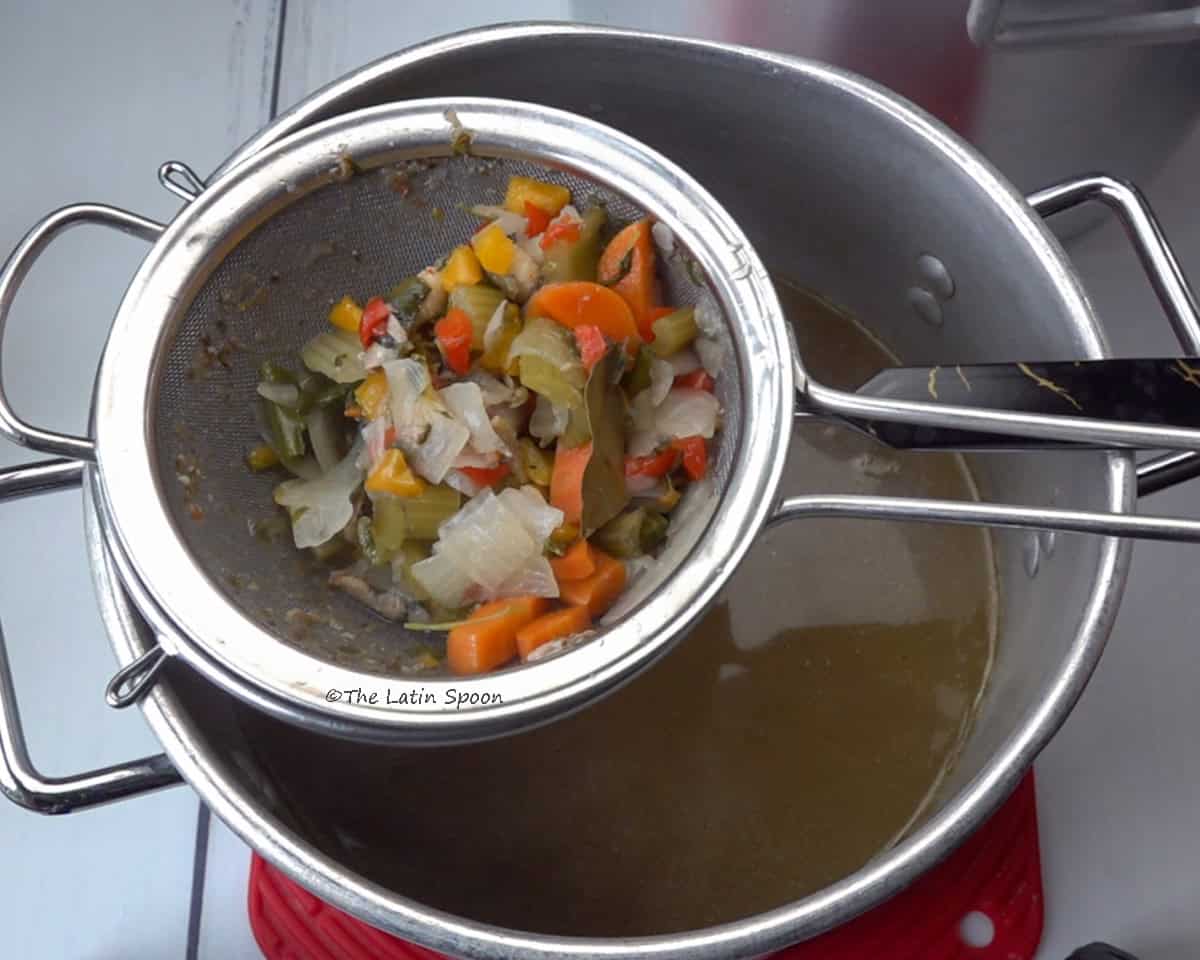
Step 8: Strain the Broth.
Remove all of the bones from the pot. Then, using a large strainer or colander, separate the broth from the vegetables. Once the vegetables are cool enough to handle, gently squeeze them to extract as much liquid as possible before discarding them. They've already released most of their flavor into the broth, but this extra step helps you get every last bit of it.

Step 9: Strain Through a Cheesecloth (Optional)
For an even cleaner broth, strain it one more time through a cheesecloth. This removes the fine sediment—tiny particles of cooked meat, vegetables, herbs, and proteins that naturally settle to the bottom of the broth during cooking. This step is completely optional, but it produces a clearer, cleaner-looking broth.
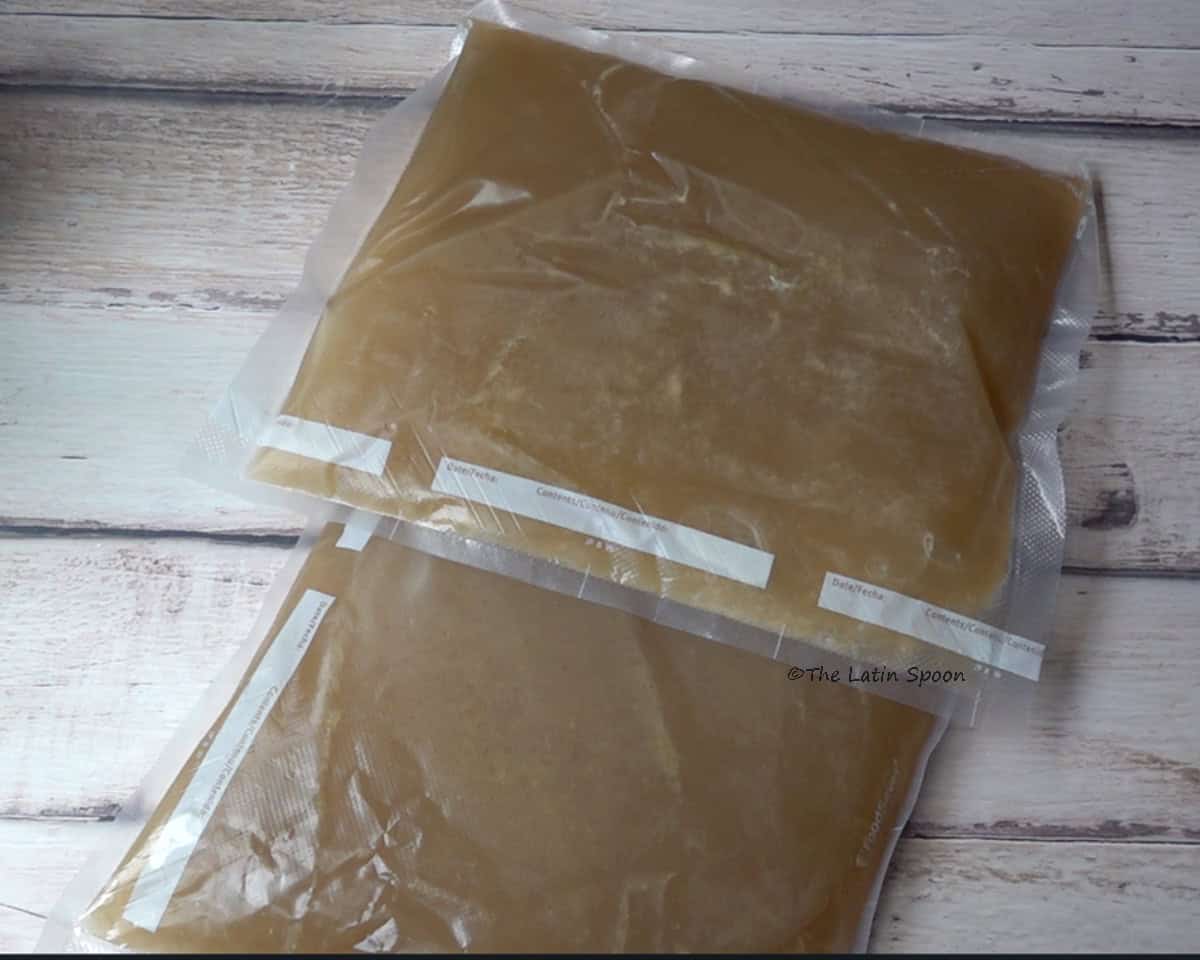
Step 10: Store the Chicken Broth.
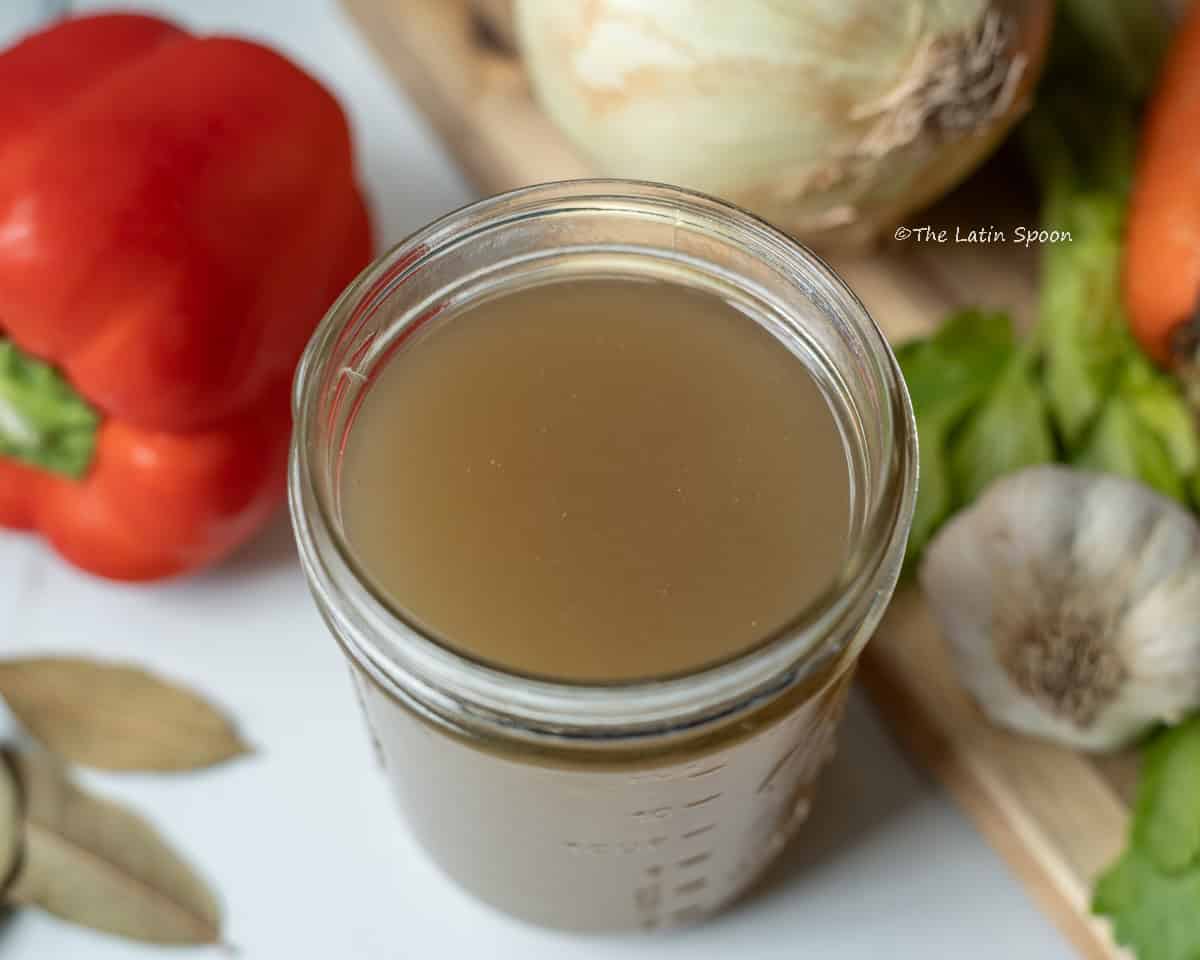
Let the broth cool completely before storing it. I like to freeze mine in freezer bags because it's easy to stack and saves space, but this chicken broth is also perfect for pressure canning if you prefer to preserve it that way. Store it using your preferred preservation method so it's ready whenever you need it.
🫙 Your Questions About Chicken Broth
Yes! This chicken broth is perfect for pressure canning. In my case, I prefer freezing it because it's what works best for my family, but pressure canning is an excellent option if you have the proper equipment and follow tested pressure canning guidelines for low-acid foods like chicken broth.
Absolutely! Rotisserie chicken carcasses still have plenty of flavor left in the bones. Instead of throwing them away, freeze them until you have several saved up, then use them to make a delicious batch of homemade chicken broth. You can even add fresh vegetables and herbs just like in this recipe to build even more flavor.
Yes! That's one of my favorite parts of making homemade chicken broth. After removing the larger pieces of meat, I even go back and clean the bones because there's usually quite a bit of chicken left. I use it to make shredded chicken, chicken soup, arroz con pollo, or any recipe that calls for cooked chicken.
Definitely. Besides the vegetables in this recipe, you can also use ingredients like zucchini, cabbage, tomatoes, leeks, mushrooms, cauliflower, or even corn cobs. Making chicken broth is a great way to use vegetables that have been sitting in your refrigerator for a while and reduce food waste while adding extra flavor.
Skimming the foam helps produce a cleaner, better-tasting broth. During cooking, proteins and impurities rise to the surface and form the foam you see on top. Removing it prevents those impurities from staying in the broth. I also remove most of the excess fat, although that's simply a personal preference since some people prefer leaving more fat in their broth.
🍽️One Batch, Months of Flavor
Homemade chicken broth takes time to make, but the payoff is well worth the effort. Not only will you have a freezer full of flavorful broth ready for your favorite recipes, but you'll also have plenty of cooked chicken to prepare additional meals throughout the week.
Learn how to make Gallina achiotada o Chicken stew here.
If you make this recipe, I'd love to hear how you use your homemade chicken broth. Leave a comment below and let me know your favorite recipes, or share any vegetables and herbs you like adding to your broth.
Besitos (Kisses)
Mara
Homemade Chicken Broth
Equipment
- Large Stockpot (12- to 16-quart)
- Kitchen Scissors and knife
- Large Colander or Strainer
- Cheesecloth (optional)
- Freezer Bags or Vacuum Sealer (for storage)
Ingredients
- 2 whole chickens
- 3 celery stalks
- 2 medium carrots
- 2 onions
- 2 bell peppers
- 5 garlic cloves
- 14 cups water
- 1 teaspoon oregano
- 1 teaspoon black pepper
- 5 bay leaves
- 1 teaspoon cumin seeds
- 1 teaspoon thyme
- 1 teaspoon basil
- 1 teaspoon rosemary
- 1 bunch cilantro
- 1 bunch culantro
Instructions
- Debone the chickens, remove the skin if desired, trim any excess fat, and place the chicken and bones in a large stockpot.
- Wash and roughly chop the carrots, celery, onions, bell peppers, cilantro, culantro, and garlic. Add them to the pot.
- Add the water, oregano, black pepper, bay leaves, cumin seeds, thyme, basil, and rosemary. Stir, bring to a gentle simmer, and cook for about 1 hour.
- Skim off the foam and excess fat that rises to the surface during cooking.
- Remove the chicken from the broth and let it cool slightly. Separate the meat from the bones and set the meat aside for other recipes. Return the bones to the pot and continue simmering for about 1 more hour, skimming any additional fat as needed.
- Add the cilantro and culantro. If desired, adjust the herbs that may have been removed while skimming the broth.
- Remove the bones and strain the broth through a large colander. Once the vegetables are cool enough to handle, squeeze them to extract as much liquid as possible before discarding them.
- For a clearer broth, strain it one more time through a cheesecloth (optional).
- Let the broth cool completely, then freeze or pressure can using your preferred preservation method.
Video
Notes
- I purposely don't add salt to my chicken broth because I don't know what recipe I'll be using it for later. This gives me complete control over the seasoning of each dish.
- Keep the broth at a gentle simmer instead of a rolling boil. Boiling causes more evaporation, reducing the amount of broth you'll end up with.
- If you double the recipe, the cooking time may need to be extended since a larger pot takes longer to come up to temperature and extract all the flavor from the chicken and bones.
- Freeze the broth in portions that fit the way you cook, or preserve it using a pressure canner if you prefer shelf-stable storage.
- Don't throw away the cooked chicken! Use it to make shredded chicken, chicken soup, arroz con pollo, or any recipe that calls for cooked chicken.

Leave a Reply